Holding the camera when pulling the picture out

Pulling the photo out of a Polaroid, normally I’m paying attention to not tearing the image tab and pulling at a steady rate. But, the hand holding the camera is very important too, and often not done correctly.

In an attempt to make the cameras smaller, Polaroid tightened the space that the film needs to make a 180 degree turn on it’s way out of the camera. Remember, the exposed film is at the front of the camera and must go around the end of the camera to exit at the back of the pack of film. If the camera is held tightly on the end the film is making the sharp turn, it get’s pinched and unable to make the desired trip.

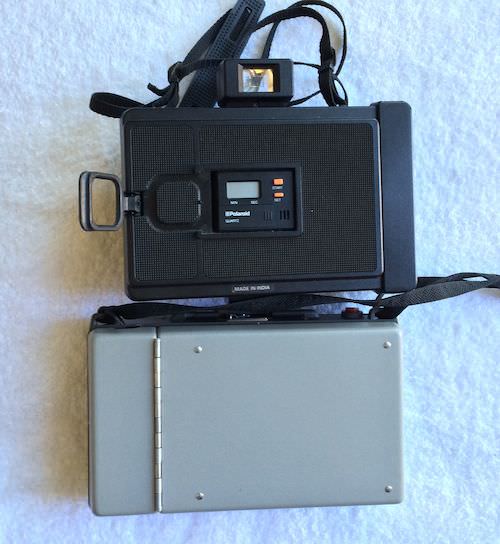
Here you can see the early Polaroid sandwiched between a Reporter and a Super Shooter.

001 pull handle polaroid

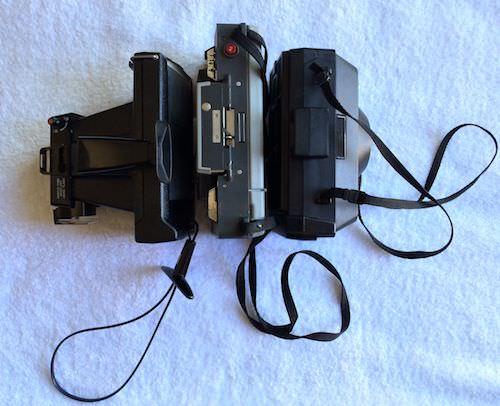
The early cameras had a handle area on one end, where the film is making the turn. The bodies are more solid and the handle is outside of the area of the turn.

002 pull handle polaroid

The Super Shooter and Big Swinger (not pictured here) have a handle that isn’t just for carrying the Polaroid. The ‘T’ handle is best used to hold the camera firmly when pulling the film out, removing the possibility of pinching the case.

003 pull handle polaroid

The ‘Reporter’ has a little ring that clicks into the back cover. Most people think this is for locking down the heat sleeve or holding the Pro’s timer. Actually, it flips out and should be used to hold the camera like the ‘T’ handle. But, the ring means fewer fingers holding the camera on pull, a trade off for removing the need for a big strap off the end of the camera.

004 pull handle polaroid

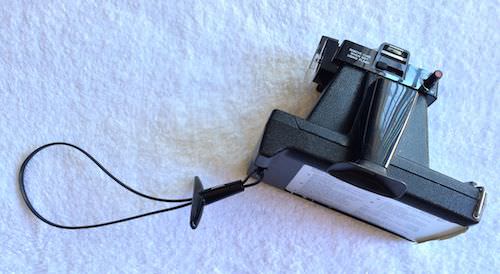
It is easy to see here how the flip out handle puts the holding area right where the extra area of the camera used to be in the earlier cameras. That extra area was also the battery holder so it isn’t there just as a handle.

005 pull handle polaroid


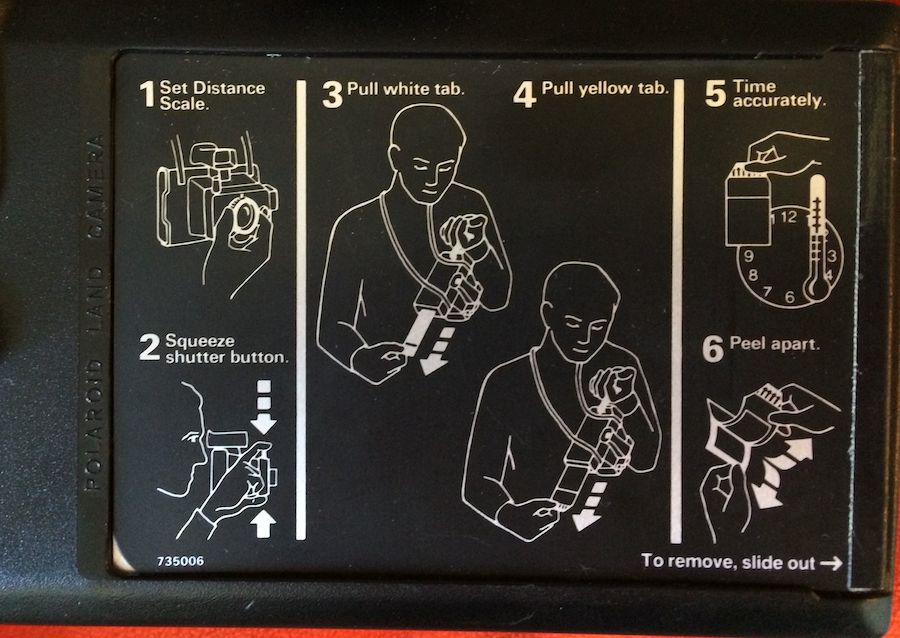
The instructions on the back of some Polaroids covers the rest of the process:

Polaroid Back

Advancing 620 Film in the Camera

Once your film is loaded into your camera, you may notice that the film is most vintage cameras won’t automatically stop at the point to take the next photo. Some cameras do know how many times you can twist the film advance nob and stop you from going too far. Though, most do not, and those will let you keep turning through the whole roll of film.

The red window on the back of the camera gives you a view of what is going on with the film advancement. After the initial pass through the area of cover paper, you will want to watch for the word Kodak or the other name of the film manufacture. This is your warning to start slowing down as the stopping point is coming up. Each stopping point, your next photograph, is marked with a counter number: 1, 2, 3,… etc. Watch out for the first one ‘1’, it looks a lot more like a pipe ‘|’ than a number. The numbers after that all look like normal printed numbers. If you go to far, vintage cameras do not have a ‘rewind roll’ option so you either keep advancing at to the spot after the numbers going foreword or waste a shot. Otherwise, you will get an area of double exposure and possibly the photo shop won’t be able to print a double wide overlapping photo. Opening the back of the camera in absolutely total darkness to roll the film back a bit is an option. I have had mixed luck with getting the tension correct as the film/paper cover need to have the right alignment to work correctly. Looseness can cause miss numbering also as well as introduce the possibility of light flares.

01a 620 film 01b 620 film 02a 620 film 02b 620 film 03a 620 film 03b 620 film

Advancing 127 Film in the Camera

Most vintage cameras using 127 film do not automatically stop at the next spot for a fresh photograph to be taken. You can literally just keep spinning the nob till all of the film is off the new spool onto the receiving spool. In order to know when to stop, you have to use the view of the film through the red dot in the back. A common problem is advancing a bit too far, thus getting less shots per roll of film. For 127 film, that should be (depending on camera) 12 shots of square format or 8 of the rectangular format.

Initially, you have to turn a lot of times as the receiving spool is small centered and you have to move the film covering then the distance across the photo box inside the camera. There is actually a ‘your almost to the next shot, slow down’ markings on the film. These are in the form of dots. As you turn the film advance nob, you will see a small dot pass by, then a larger, larger, then the number for the photograph, stop there. Most film have three warning dots, then the number. Crank till the number is in the middle of the red eye and stop for the next photograph. Don’t worry if the numbers are upside down, generally they will be.

There is no going back, so if you go too far, remember how far you went past the number and do the rest of the roll that way. Or else, the late, then next photos will overlap creating an area of double exposure. You could open the camera in total (I mean 100% black!) darkness and roll the film back onto the starting roll but the multi layers of film/paper can get it’s tension off and then the next photos might have light flare issues.

01 127 film 02 127 film 03 127 film 04 127 film