Instant Photos Explained: The Science of Polaroid Film

How Polaroid Film Works 

A brief overview of the instant photography technology 

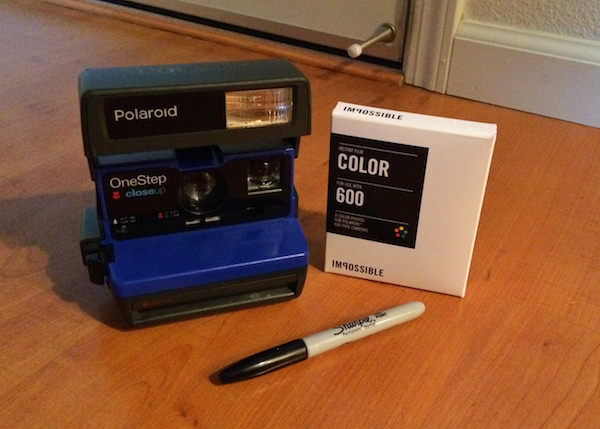
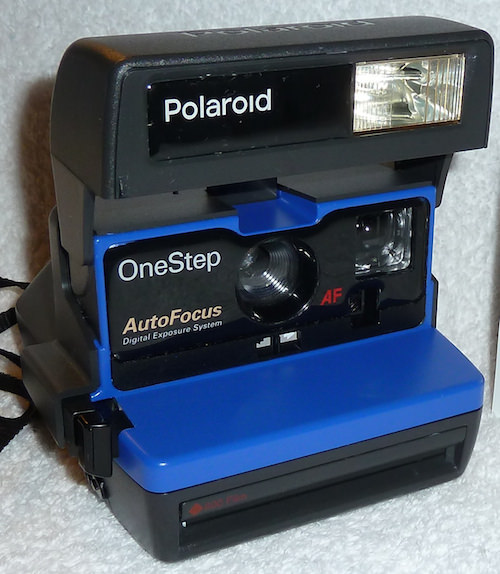
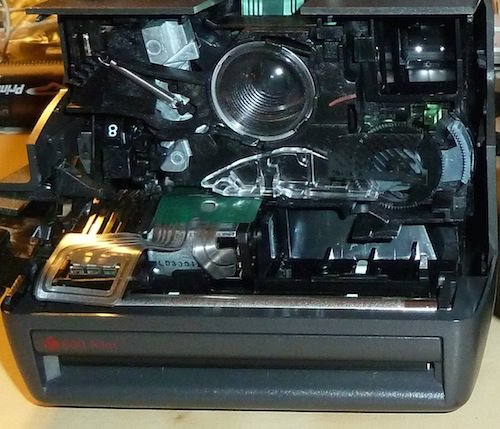
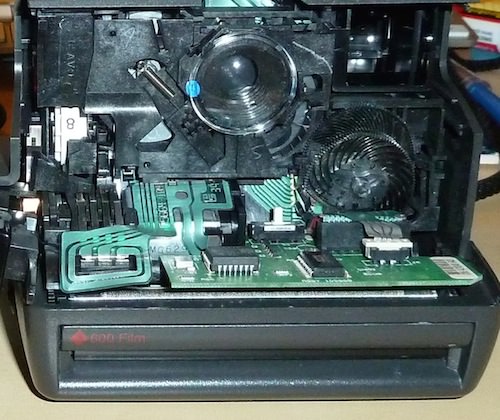
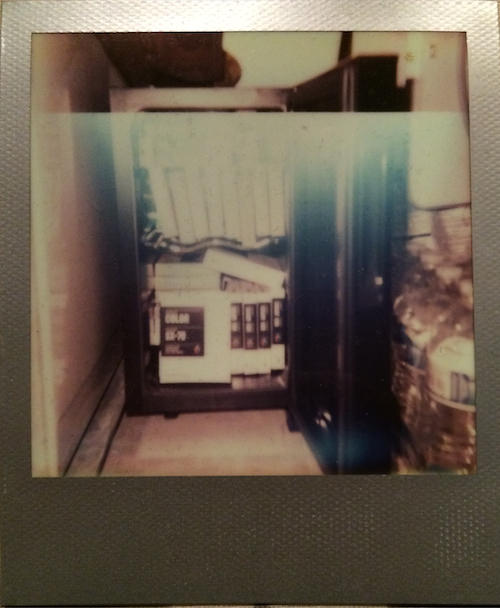
Polaroid film is a type of photographic film that produces instant prints without the need for a darkroom or a chemical process. It was invented by Edwin Land in 1947 and became popular for its convenience and novelty. Polaroid film consists of several layers of light-sensitive materials, chemicals, and a plastic cover. When the film is exposed to light, a chemical reaction occurs that creates a latent image on the film. The film is then ejected from the camera and passes through a pair of rollers that squeeze a pod of developer solution onto the film. The developer solution spreads over the film and initiates a second chemical reaction that reveals the image on the film. The image is fully developed in a few minutes and protected by the plastic cover. The process of polaroid film is different from conventional film, which requires a negative and a positive print to be made separately. 

In 2008, Polaroid discontinued production of instant photography print film. The last facility was purchased by a private party. Since the chemicals used in the process below were no longer legal to produce and use in a product, the new company, The Impossible Project, had to recreate from new in order to create and sell the famous film. Each batch has slight tweaks and improvements as well challenges to the quality and success of the prints. Purchasers of the film should know it is a complicated mix of chemicals that at times, especially in hot and cold environments, may provide creative results. 

How the Polaroid Film Layers Work 

  • The top layer of the polaroid film is the plastic cover, which protects the film from dust, scratches, and fingerprints. It also acts as a filter that blocks ultraviolet light and enhances the colors of the image. 
  • The next layer is the image-receiving layer, which is a transparent sheet that contains dye molecules that react with the developer solution. The dye molecules are initially colorless, but they change color when they combine with the developer solution. The image-receiving layer forms the positive print of the image. 
  • The third layer is the image-forming layer, which is a sheet of silver halide crystals that are sensitive to light. When the film is exposed to light, the crystals form a latent image that corresponds to the brightness and contrast of the scene. The image-forming layer forms the negative of the image. 
  • The fourth layer is the timing layer, which is a thin layer of gelatin that controls the rate of the chemical reactions. The timing layer slows down the developer solution so that it reaches the image-receiving layer at the right time. The timing layer also prevents the developer solution from reaching the image-forming layer, which would ruin the image. 
  • The fifth layer is the acid layer, which is a layer of acidic material that neutralizes the developer solution after it has reacted with the dye molecules. The acid layer stops the development process and stabilizes the image. 
  • The sixth layer is the opacifying layer, which is a layer of black pigment that blocks the light from reaching the image-forming layer. The opacifying layer prevents the image from fading or changing color over time. 
  • The bottom layer is the base layer, which is a plastic sheet that supports the film and provides rigidity. The base layer also contains a pod of developer solution that is ruptured by the rollers when the film is ejected from the camera. 
When the chemicals have challenges

Making the Connection SX70 to Neck Strap

If you have a SX70 neck strap (rather than using a generic camera neck strap), you may have noticed that the end of the clip has a curve to it. The factory design clip is a squeeze type that isn’t a straight clasp.

Original Polaroid leather neck strap with clasps

Original Polaroid leather neck strap with clasps

You can clip onto the camera with the clasp curve either way. If you think about it, you could reason that one way might force the camera away from the body, while the other way may allow the camera to hang straight. Is there actually a ‘correct’ way?

Yes, Polaroid does specifically call out on their packaging one way is correct, the other isn’t.

Polaroid Guide for SX70 Neck Strap Attachment

Polaroid Guide for SX70 Neck Strap Attachment

Holding the camera by the bottom, the clap connects from the bottom up, rather than clipping downward. The science behind that? I have yet to find that, but will let you know when I do.

Polaroid 600 Focus – If You Can Touch It, Your Too Close

The Polaroid camera says to the photographer, “It’s not me, it is you”.

This article is about being successful at taking instant print photos with a Polaroid 600 OneStep that are in focus. This is the same for all auto eject cartridge Polaroids with the exception of Sonar focus SX70 and 660, manual focus models SX70 and Pronto RF and the SLR680/690 models.

Polaroid put all of the technology in the 600 models around the flash. The flash is electronically controlled based on the light in the area and the light from the flash bouncing back to the camera sensor. Polaroids will automatically adjust the strength and length of the flash.

For focusing, the 600 is built to take photos of things just over 4 feet away to infinity, thus is called a “Fixed Focus”. I get a lot of folks dropping by with cameras they have bought online, at yard sales, from the manufacture and rebuilders. They ask me to adjust the focusing of the camera as they are getting prints that are out of focus. There must be something wrong with the focusing!

First, there has to be an appreciation of how a 600 model produces a print. There is a plastic lens that can be seen on the front of the camera. Behind the lens is a shutter arm that allows light (the image) to enter the camera. The light is reflected off of a mirror and down onto the print film. That is it. There is no moving parts for the focusing… other than the photographer. So, it is important to know the limitations of the camera and adjust to live within those. As the title of this article says, if you can touch the object your taking a photo of, your too close.

How far is ‘further than 4 feet away’ Try standing with your toes against a wall. Leave one foot against the wall and place the other foot toes to the heal of the foot against the wall. Take the foot that is against the wall and put it’s toes behind the foot that is behind… basically your going to back up toe to heal, five times. As long as you have average size adult feet, the distance you are away from the wall after doing the toe to heal 5 times is how far away from something to have it be in focus on the print. You have to actually be more than 4 feet away, since with the camera in front of your face it will be another 6 inches plus closer to the object being photographed.

“This wasn’t a limitation in the old days”. I had a manual focus SX70 and a early 600 in those ‘old days’. As well, I buy a lot of Polaroid prints from estate sales as reference. When film was all there was, people had learned the limits of their film cameras and adjusted their expectations. We are all so used to digital photography and near limitless software tuning our images, it is easy to forget the things we did without thinking about it because that is what we had to do.

Almost all of the latest 600 OneStep Polaroids do have a slide over ‘Close Up’ lens. Don’t forget you have that for those times you find you need to take a picture of things closer than 4 feet. I find the solution works nicely for things 3 feet to just over 4 feet away, even though most literature claims you can get as close as 2 feet from your subject.

One last item to consider when needing to photograph a item in low light that appears to be ‘out of focus’ in the print, it may actually be that those parts are over exposed. If your in a very low light area, the camera sees that and adjusts the flash to fill as much as it can. If you have a single individual’s face around 5 to 6 feet away, the flash may wash their face out due to the light attempting to fill in the dark areas. You are then getting a heavy light reflection off the face. You may try having the person turn there head slightly or add more light to the area so the Polaroid doesn’t do a maximum flash.

I am challenged with where the point is that is just over 4 feet away. So, I purchased a small laser range finder for around $45 US. There are many options on the market. Or, a small tape measure is less tech but can be really small to carry.

SX70 Sonar Getting More Using A Flash

The obvious beauty with using a SX70 Sonar is it is simple to use. You can actually focus on things near or far away for nice depth photos. The autofocus is fast and you can see through the viewfinder what you will get. Not general information like with the 660 Sonar Autofocus or 600 Autofocus, cameras that have a viewfinder separate from the photography lens’s view.

P1100102

The less obvious, but equal effect for tuning photos is using a flash. I use a Mint Electronic Flash (available direct or through The Impossible Project) when using a older Polaroid Box camera or the SX70 (Alpha and Sonar). The Mint Flash has a 1/2 power and full power setting. Most people use the default of Full Power for SX70 film and 1/2 Power for 600 film. Included with the flash is a couple color gel defusers.

Mint Flash

When looking through the viewfinder, there is a small red light on the right that will appear if the camera feels there isn’t enough light without a flash. It is important to know, you can still take a photo. The camera will extend the length of time the shutter is open. If your going to do a lot of low light photography (like night light tracking), mount the SX70 Sonar on a tripod. If your Sonar doesn’t have a tripod mount screw, there are clip on plates available.

This is an example of a pumpkin with a light inside, in a dark area of the house, white background. I didn’t use a tripod on purpose to show that you can get a reasonable shot but the camera has to be really still. Otherwise you get what looks like light it bleeding but really it is the camera catching the movement with the shutter open.

01 No Flash

Next, this is 1/2 Power Flash on the Mint Electronic Flash. Normally the setting for 600 Style film (Impossible Project). As you can see, there is a different effect with the contrast/saturation coming through. Something to consider when looking for impact in a lower light subject. Notice though that the outer edges of the print area isn’t able to get the full power of the light.

02 Mint half flash

Finally, the flash on Full Power, as is suggested by Mint. This results in the classic Polaroid Print we are all familiar with.  There is more possible for adding punch to your Polaroid Prints by understanding the power in your hands. And this, without even touching the manual light/dark override dial.

03 Mint full power flash

Getting Close Up shots ‘in focus’

There was an option on the Polaroid 600 model that doesn’t have autofocus to have a ‘Close Up’ lens built in. This feature was on the Sun/Spirit as well the OneStep 600 (not the box style Polaroids). You will recognize the cameras by the small plastic slider below and to the side of the main lens, between the lens and bright/dark compensation slider.

P1070778 P1070910 P1070979

Moving the lever towards the lens slides a plastic lens over the front of the main lens as well inside of the viewfinder area. These are not precision ground glass lenses, so the lens and distance between the main lens and the close up lens can vary a bit between cameras.

Since this is a lens over a lens, you aren’t taking a camera that focuses 4 feet to infinity and giving it 2 feet to 4 feet range. There is a sweet spot, or distance, that each camera has. Normally, as I move from one 600 OneStep to the next, I find it difficult to get the exact ‘in focus’ distance when using the close up lens. So, I end up with things at different distances in and out of focus.

Using that ‘issue’ to your advantage, there is a first test you should do when you pick up a Polaroid with a close up lens before going out and using the camera. Place the camera in a spot on a long table or on the floor. Now, take small objects (chess pieces, small stuff animals, dominos… etc…) and place on at foot distances away from the camera. Be sure one does not completely hide the one behind it. If you are using things like chess pieces or dominos, you can place one every half foot to get more precision. Now, snap a photo. The print will show you quickly what the perfect ‘in focus’ distance is for that camera.

My Polaroid Water Conservation Kit

The level of water conservation each summer varies from year to  year. This year happens to be one where the state has decided to fine people if they appear to be wasteful. I find that people don’t purposely waste water, rather they are unaware of where they may be able to save a bit without much effort on their part.

On my morning walk, I sometimes see sprinkler systems that are broken or out of adjustment. This means that they may have a geyser of water shooting up from a sprinkler top broken, or a sidewalk getting well watered instead of the lawn in the case of a sprinkler getting twisted. Both are things a person would fix but most likely are completely unaware of the problem. Sprinklers run at dawn, well before home owners are outside.

The first time I noticed the issue, I attempted to look the address up on the internet and then find a email address. It was more effort and less creepy than the solution I had at hand. A photo is worth more than words and makes the explanation easier, but a email address is needed to handle the digital photos. Instead, I have my trusty Polaroid 600, loaded with a pack of Impossible Project color film and a sharpie.

Now, I snap a photo, write a quick ‘nice’ message on the print and leave it on the door. No need to be rough in the text, keeping it nice means folks welcome the information to help avoid a fine. So far, 100% of the Polaroids left have resulted in a fix happening… and water saved. And, it’s fun taking photos of water mist early in the morning.

Water Conservation Polaroid

Digitizing Your Polaroid Prints

While I love to shoot with film and instant print cameras, sharing by design is limited. The fun of the experience is the personalization of taking a single photo and then sharing something I hand to someone.

But, that doesn’t mean there aren’t times when  the draw of sharing digital photos isn’t calling my name. Luckily, the folks with the Impossible Project offer an app for the iPhone to make Polaroid prints into digital images.

The Impossible Project app offers the ability to convert digital photos into Polaroid prints, convert Polaroid prints into digital images, view Polaroid prints shared (you can share your converted prints too) as well, access to their store to buy film for your Polaroid camera.

02 Impossible Project App

With the Impossible Project app, you snap a photo of your Polaroid Print. There is an option to choose between the 600/SX70 frames vs the wider Spectra prints. Then, choose the corners of the print and ‘crop’.

03 Impossible Project App

The digital image of your print can then be saved to your iPhone and/or shared to the Impossible Project social share service (free).

04 Impossible Project App

Polaroid 600 AutoFocus – Wink Instead Of Sonar

The first Polaroid SX7o had a dial for a user to estimate the distance to their subject as a method to tell the camera what was in focus. After a short time, a split circle Range Finder focus solution was added to remove the guess work for focusing. Then, the ‘AutoFocus Sonar’ was added. It is recognizable by the large gold grill circle on the front of the camera. The Sonar focus system works by sending out a sound pulse then measuring how long it takes to get back to the camera to know the distance to focus to.

IMG_3575

The 600 Series Polaroid have a variety of versions.

The basic 600 has no special focus, it is set to photograph things 4 feet and further away.

P1050332

An updated 600 came with a Close Up lens (normally called the 636) which is manually slid over in front of the camera lens to better focus on item 2 feet to 4 feet away.

P1040692

The ‘Pro’ version of the 600 (normally called the 660) had the large Sonar focus gold grid that automates pin point focusing.

P1050004

A less known 600 is the AutoFocus that does not have Sonar. It uses, though not mentioned anywhere in it’s literature, the ‘Wink’ focus method.

P1050445

I spent a period of time trying to figure out how the auto focusing on this 600 worked. Pulling the cameras apart, searching my repair manuals. Finally, by shear luck, I came across the patent for the technology.  I say shear luck since Polaroid has a LOT of patents. In it, the system is highly detailed in tech and lawyer speak, it is a patent after all.

The Wink technology is an adjustment to the sensor that tells the camera if the flash is needed and how strong to flash the strobe. Rather than just watching for light bouncing, part of the sensor has a filter over it that restricts the light down to InfraRed which isn’t visible light. The problem with just using the light bouncing off an object is that it can be confused by colors, like a dark blue shirt vs a white sweater will be seen differently yet the two people are the same distance away. The IR sensor doesn’t see colors so it isn’t confused, rather it sees light not visible to the human eye so it can be used to calculate distance based on how long it takes the bounced light to return.

While a Polaroid camera appear outwardly as a simple camera, actually the strength and timing of the flash as well the time the shutter is open is all closely controlled. When you push the shutter, an internal timer starts for when the camera lens shutter will actually open. The flash starts to pulse, and the sensor starts watching the light coming back. If the light comes back really quickly, the flash lessens it’s brightness and the shutter fires quicker. If the sensor says it is dark, the time for the light takes a long time to come back, the flash goes long and the lens stays open longer. Sounds simple, but all of this is happening in hundred of milliseconds (the shutter fires automatically if it isn’t told differently at 124 ms, and the whole process won’t exceed 396 ms… wow!).

Since I doubt you will ever pull your Polaroid 600 apart, here is a couple photos you might find interesting. The first is the inside of a version of the camera that has the manual close up lens. The lens is part of the cover that is removed. What you can see here is in the center, just below the lens is a mechanical arm that is connected to the switch on the front of the camera which allows for the adjustment of light/dark backgrounds. On the right, you can see the filtering geared circle that controls the amount of light that reaches the sensor to vary how the camera take the picture. This is seen through a square on the front of the camera just below the viewfinder lens.

P1050365 a

In the case of the (non-Sonar) AutoFocus Polaroid 600… oh, look at the electronics. The camera has moved away from the user actually manually adjusting things. Instead, when the light/dark slider on the front is moved, it is actually a three position switch that is moved. The white switch can be seen below and to the right of the lens. Moving the arm doesn’t move a filter, instead in this case it just tells the program that calculations need to be done to compensate for over light/dark backgrounds.

P1050365 b

How to remove a partially used Polaroid film pack without ruining it

Sometimes, there is a need to pull a partially used film pack cartridge out of a Polaroid camera like a 600 series or SX70. It might be because the camera is having an issue, or you need to move the unused film to another camera.

I used to go into a zero light room and pull the cartridge out to put in a black bag or the other camera. Placing the cartridge in another camera, the camera auto ejects the top image… a waste of a print. My thought was that by just opening the camera film door, the film would be ruined.

Actually, opening the door doesn’t effect the film. With the door open, the trick is to insert the black card that ejects when a fresh film pack is initially put into the camera. It can be tricky to get the card over the upper most unused photo frame and under the case rail. But, it is possible, and by doing so the cartridge can be removed without loosing the use of a photo.

When you open the film door on your Polaroid, you will need to use the card to pull the thin black plastic lip back in order to see the print cards in the film cartridge.

Here is a video from The Impossible Project outlining the process to fix a sticky film issue. But, the removal steps are the same for what ever the reason you have.

Recently I have found that the first print out of the pack when I move it to another camera has the top of the photo print is nice and the rest is less perfect. It is always the first print only. It is leading me to believe that action of pushing the top card back in might be compromising the small chemical pack. If your doing this to test a camera works or not, it will give you that info. Otherwise though, if the top photo is a throw away, perhaps I will go back to swapping the pack in a dark room and having the top photo wasted as it gets ejected like the top card does.

Impossible print

UPDATE – I have been having very good luck with using an old Polaroid print to slide in on top. It doesn’t seem to cause the next print to have any/much streaking, the camera pushes it out better when first loading the cartridge, and the corners don’t curl and scratch like using the original top card does.